WEM Starfinder Restoration Project –
written by Gordon Heley. (also published within the Vintage Hofner website.)
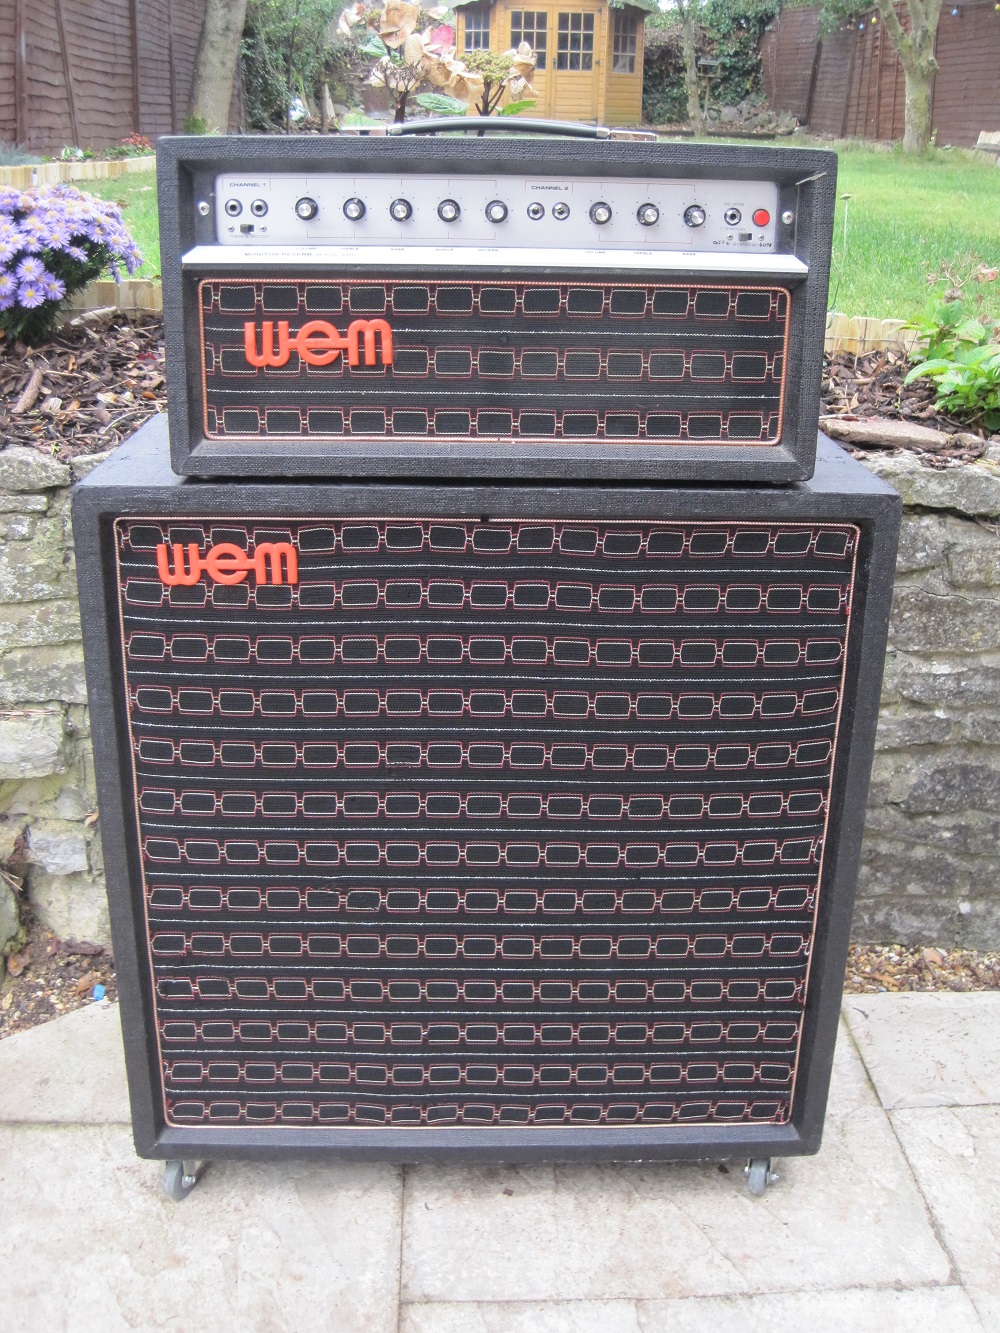
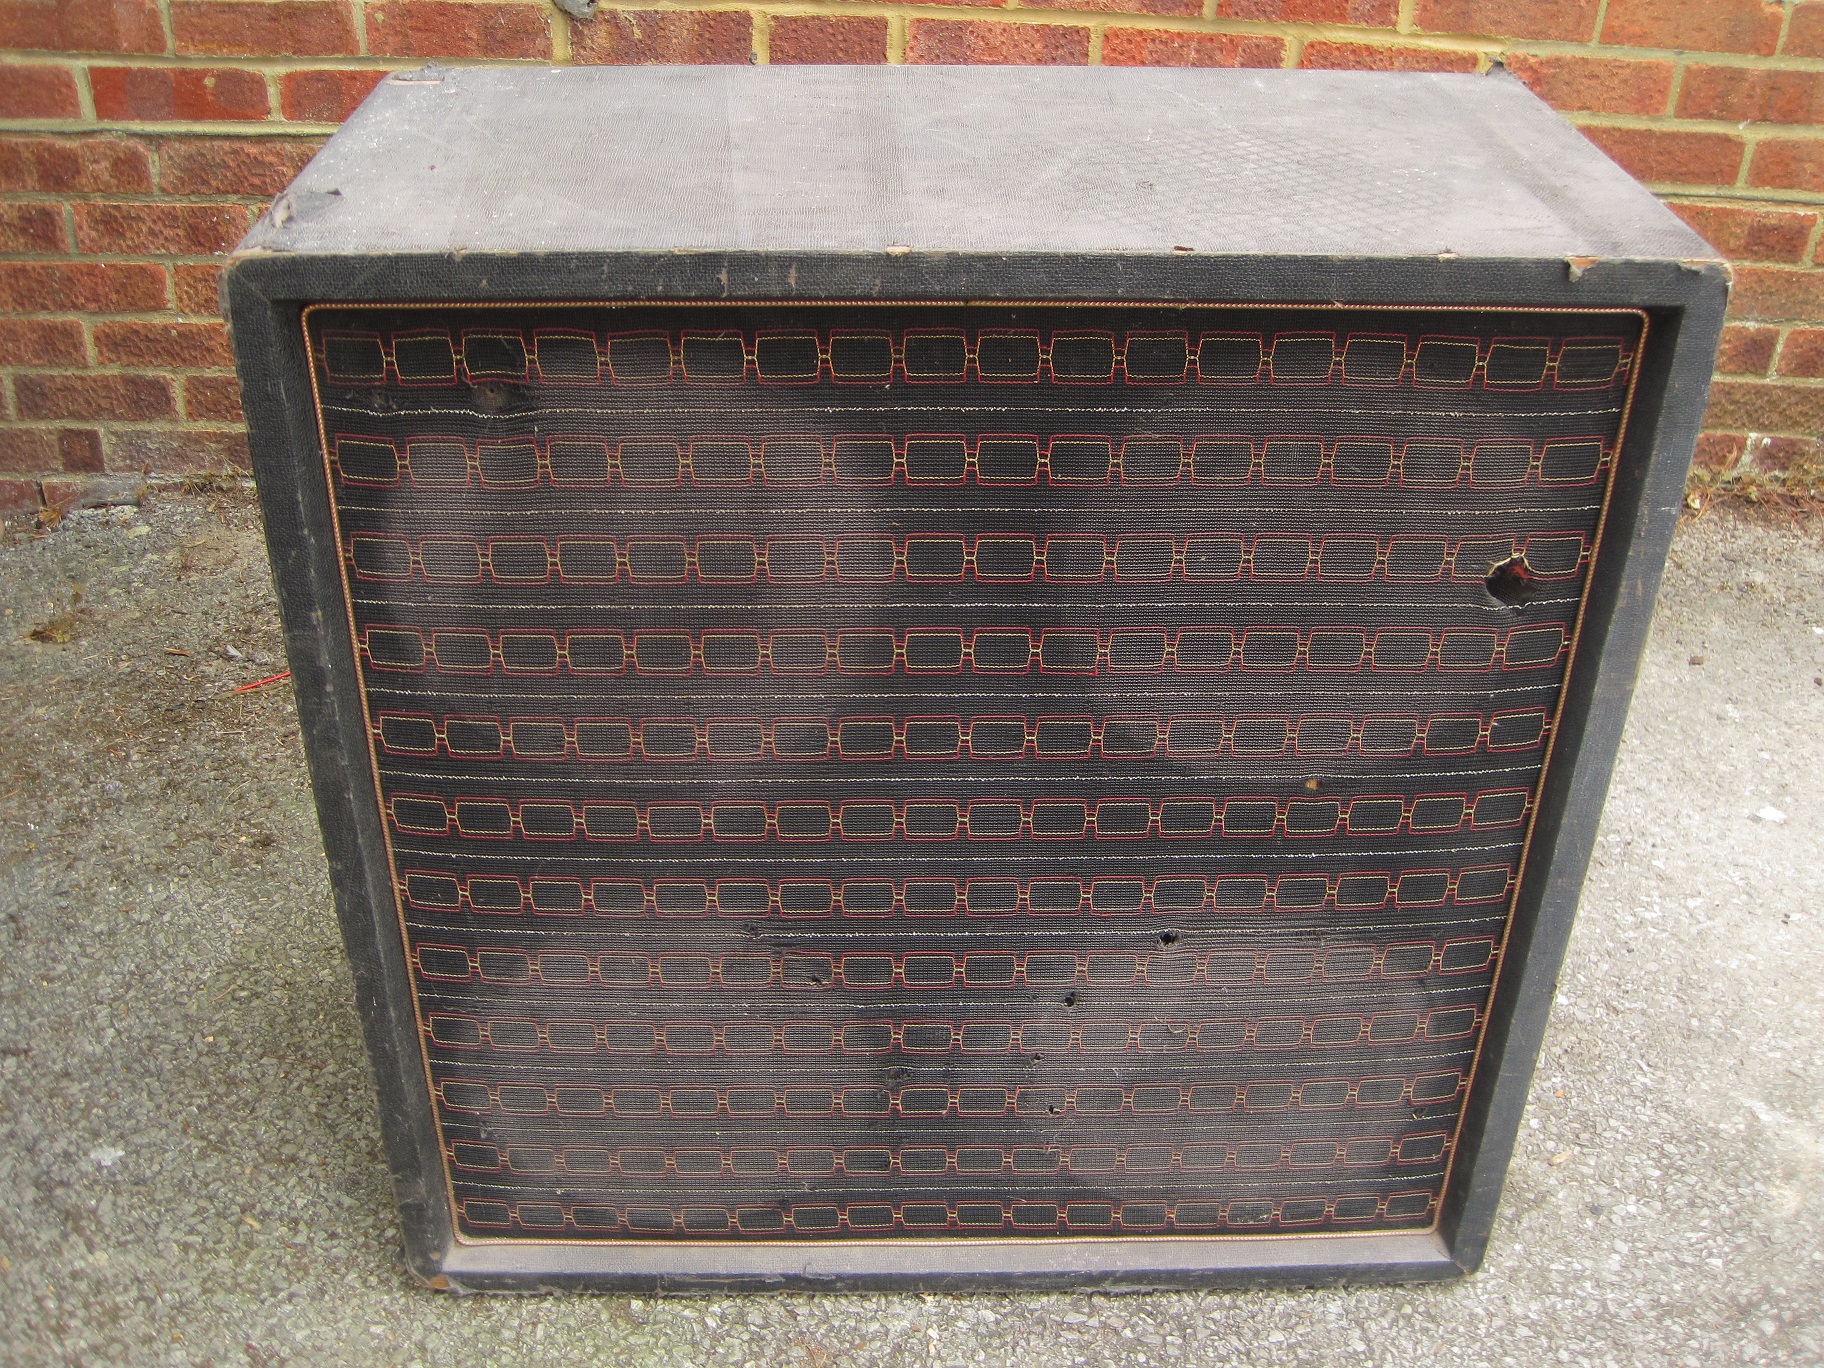
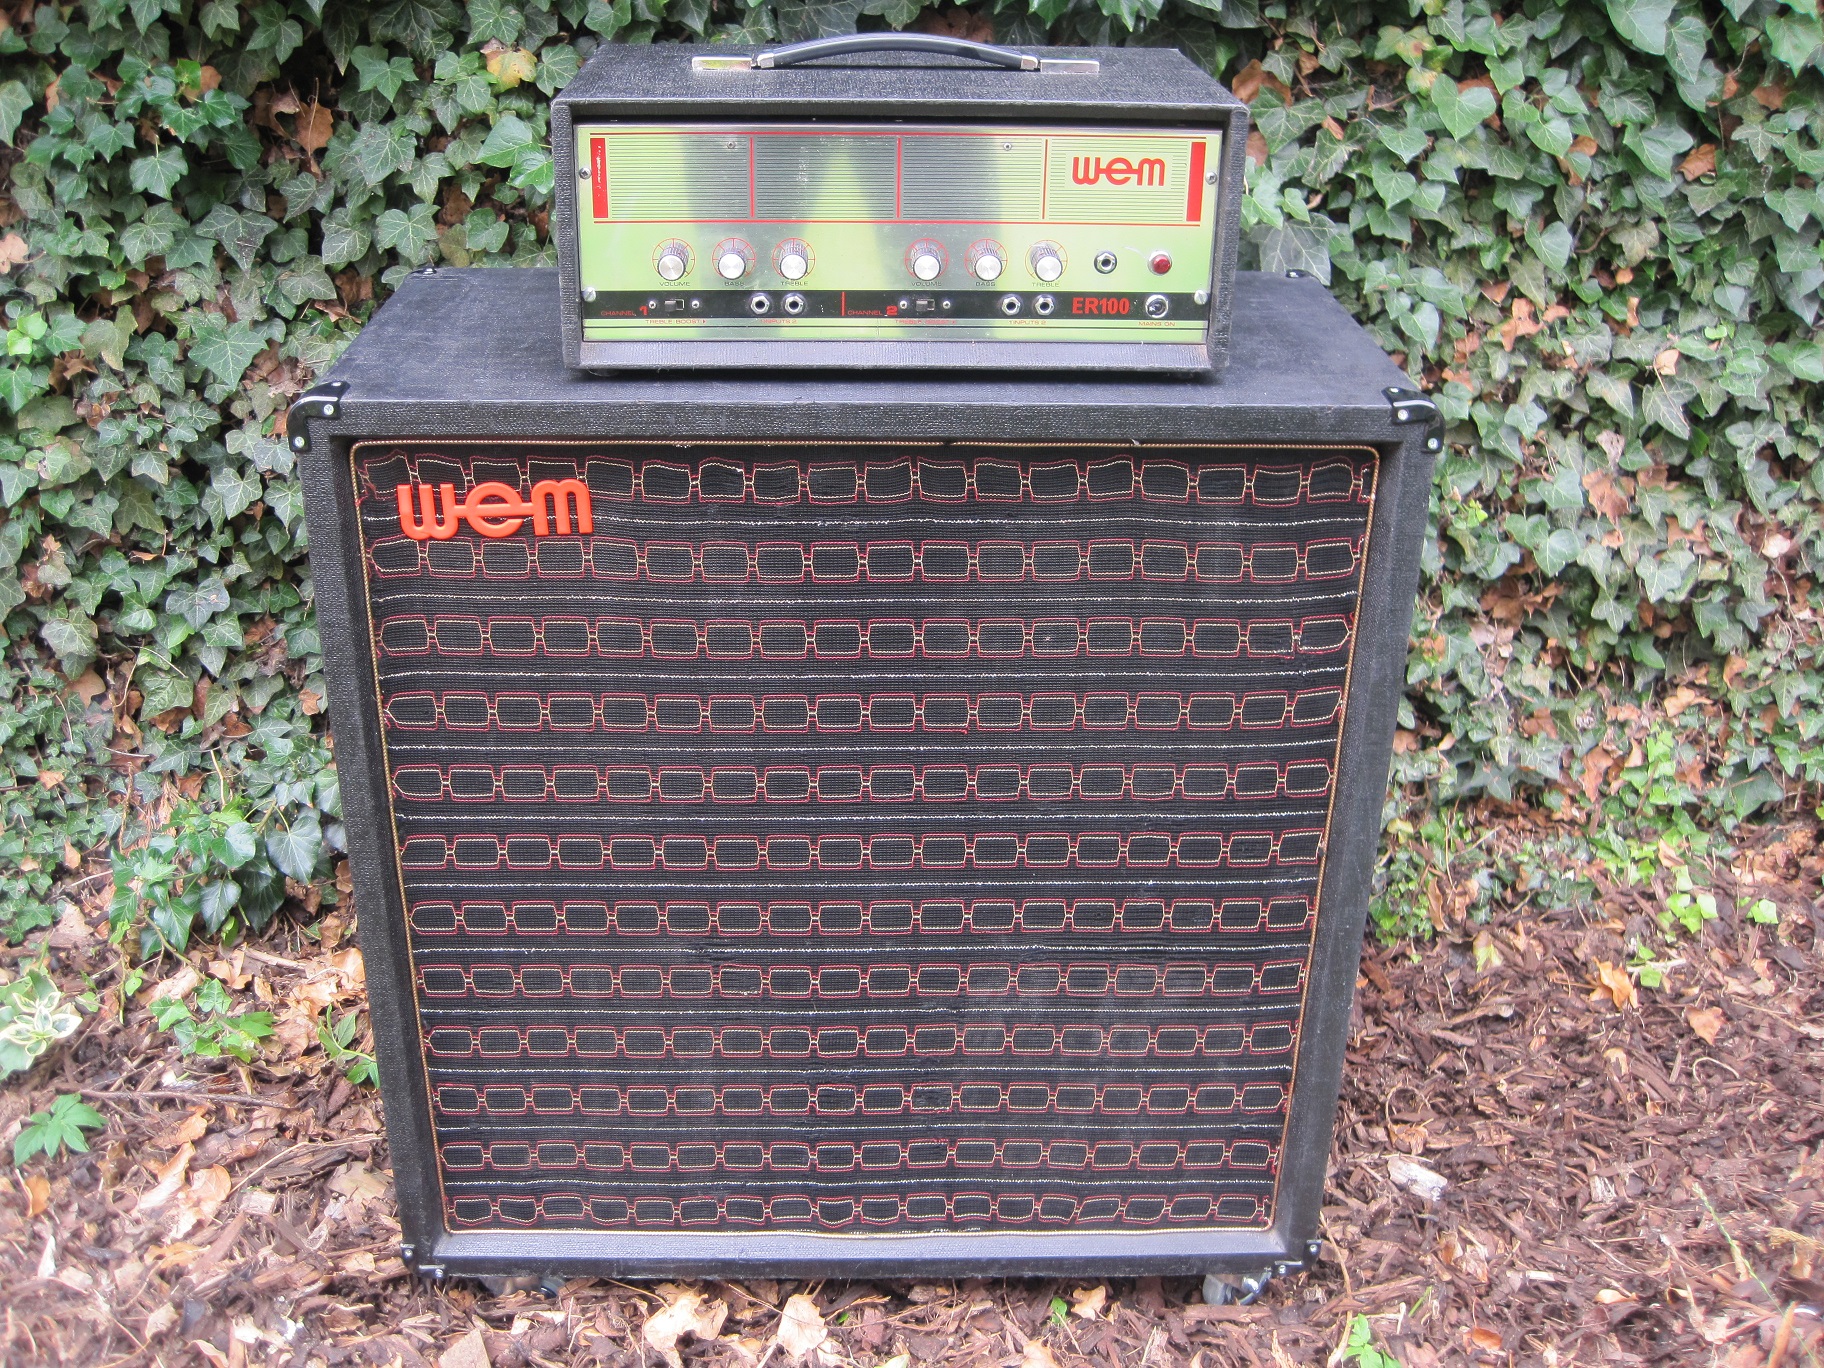
WEM STARFINDER 4×12” Speaker Cab – Fully loaded and working. Pictured with a WEM Monitor Reverb head.
(More pics available in the Starfinder section of My WEM / Cabs)
This is an original WEM Starfinder Cab from the 60s/70s.
Some time ago I was contacted by an acquaintance who knew I was interested in WEM equipment. He had purchased a pair of WEM speakers from a friend who had them stored away for a long time but he didn’t have much info other than that one of the cabinets was in very poor condition.
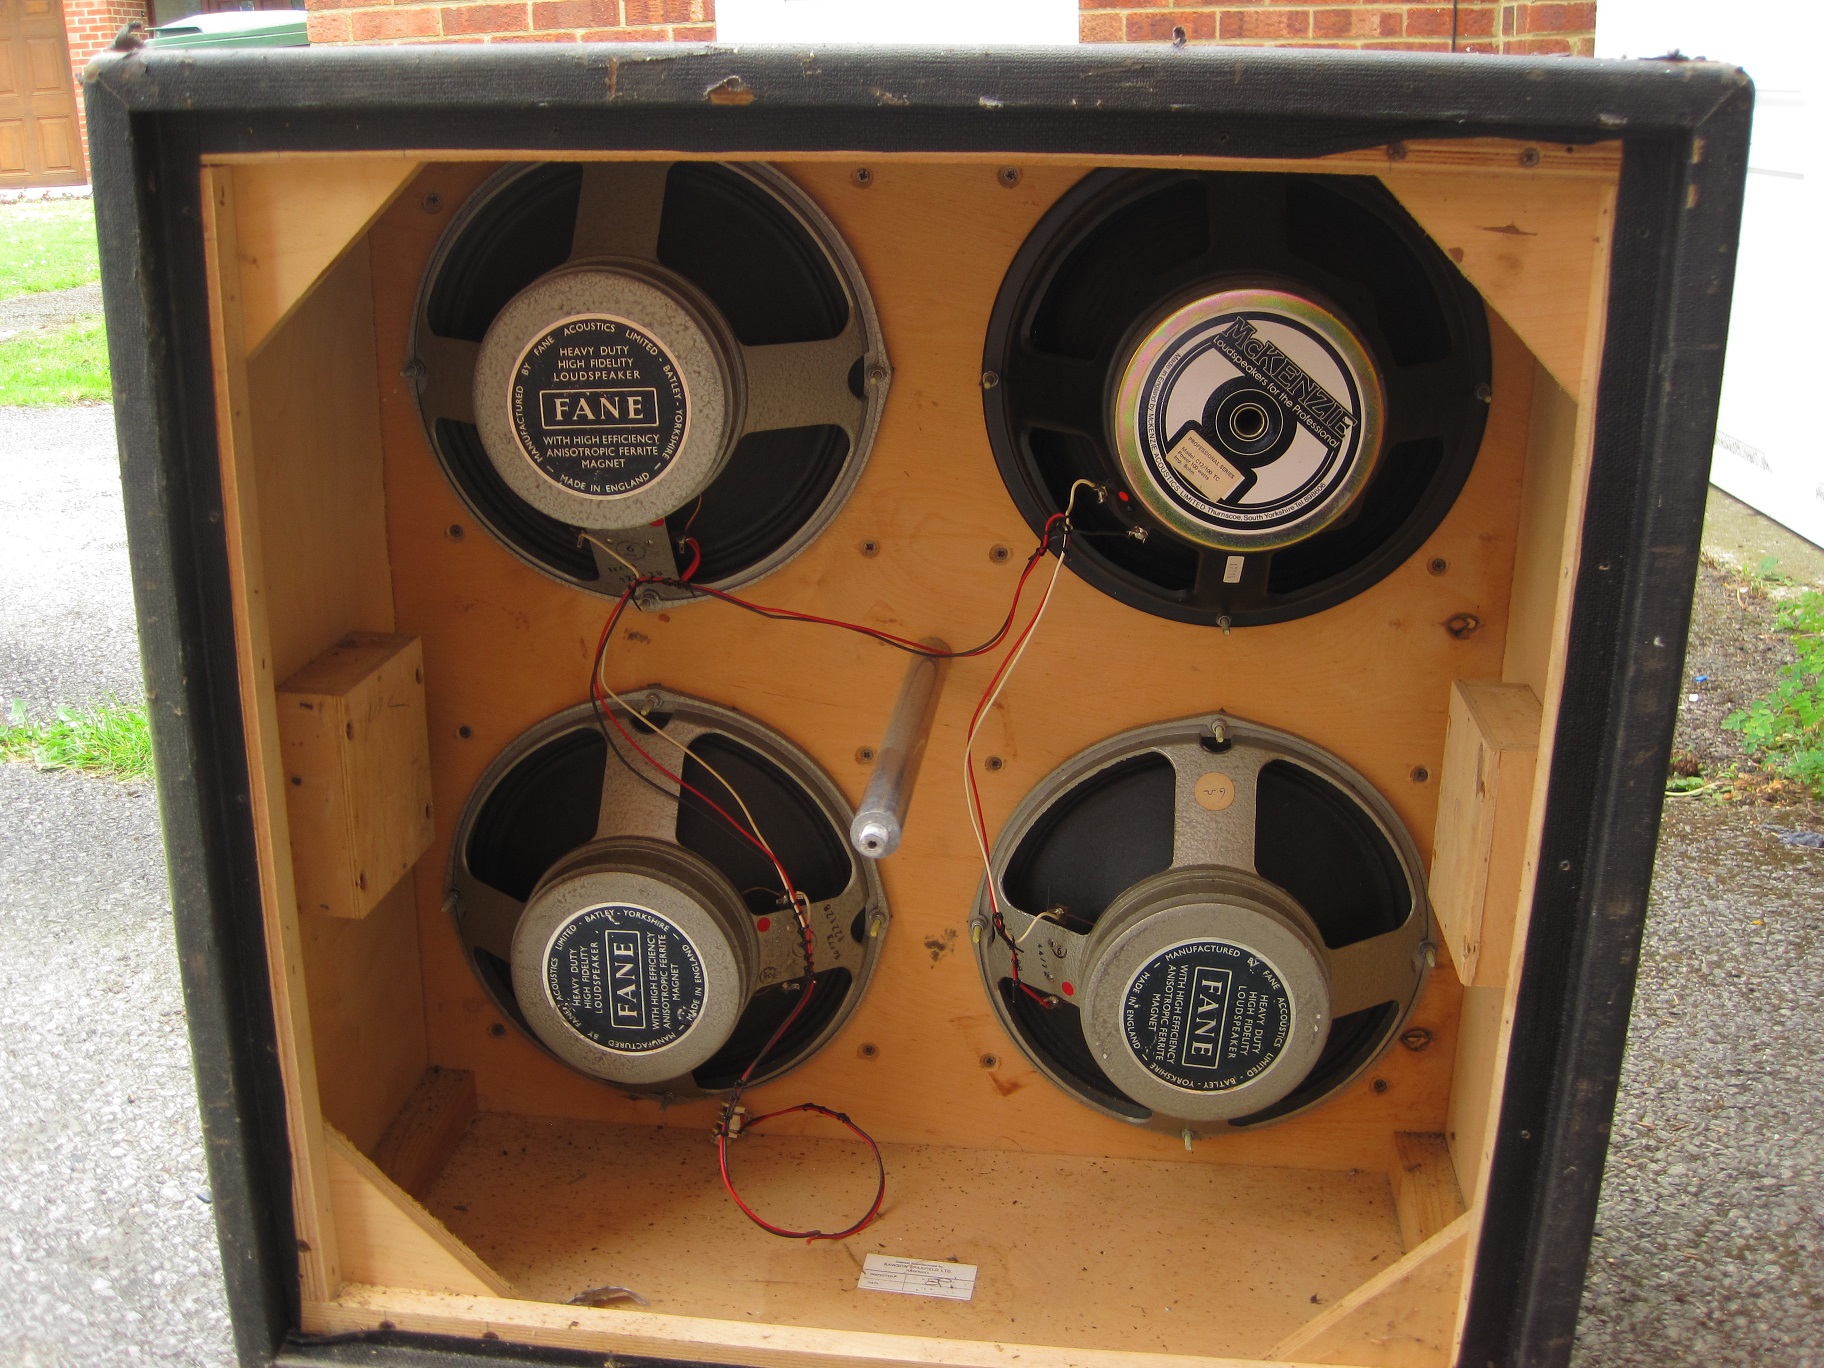
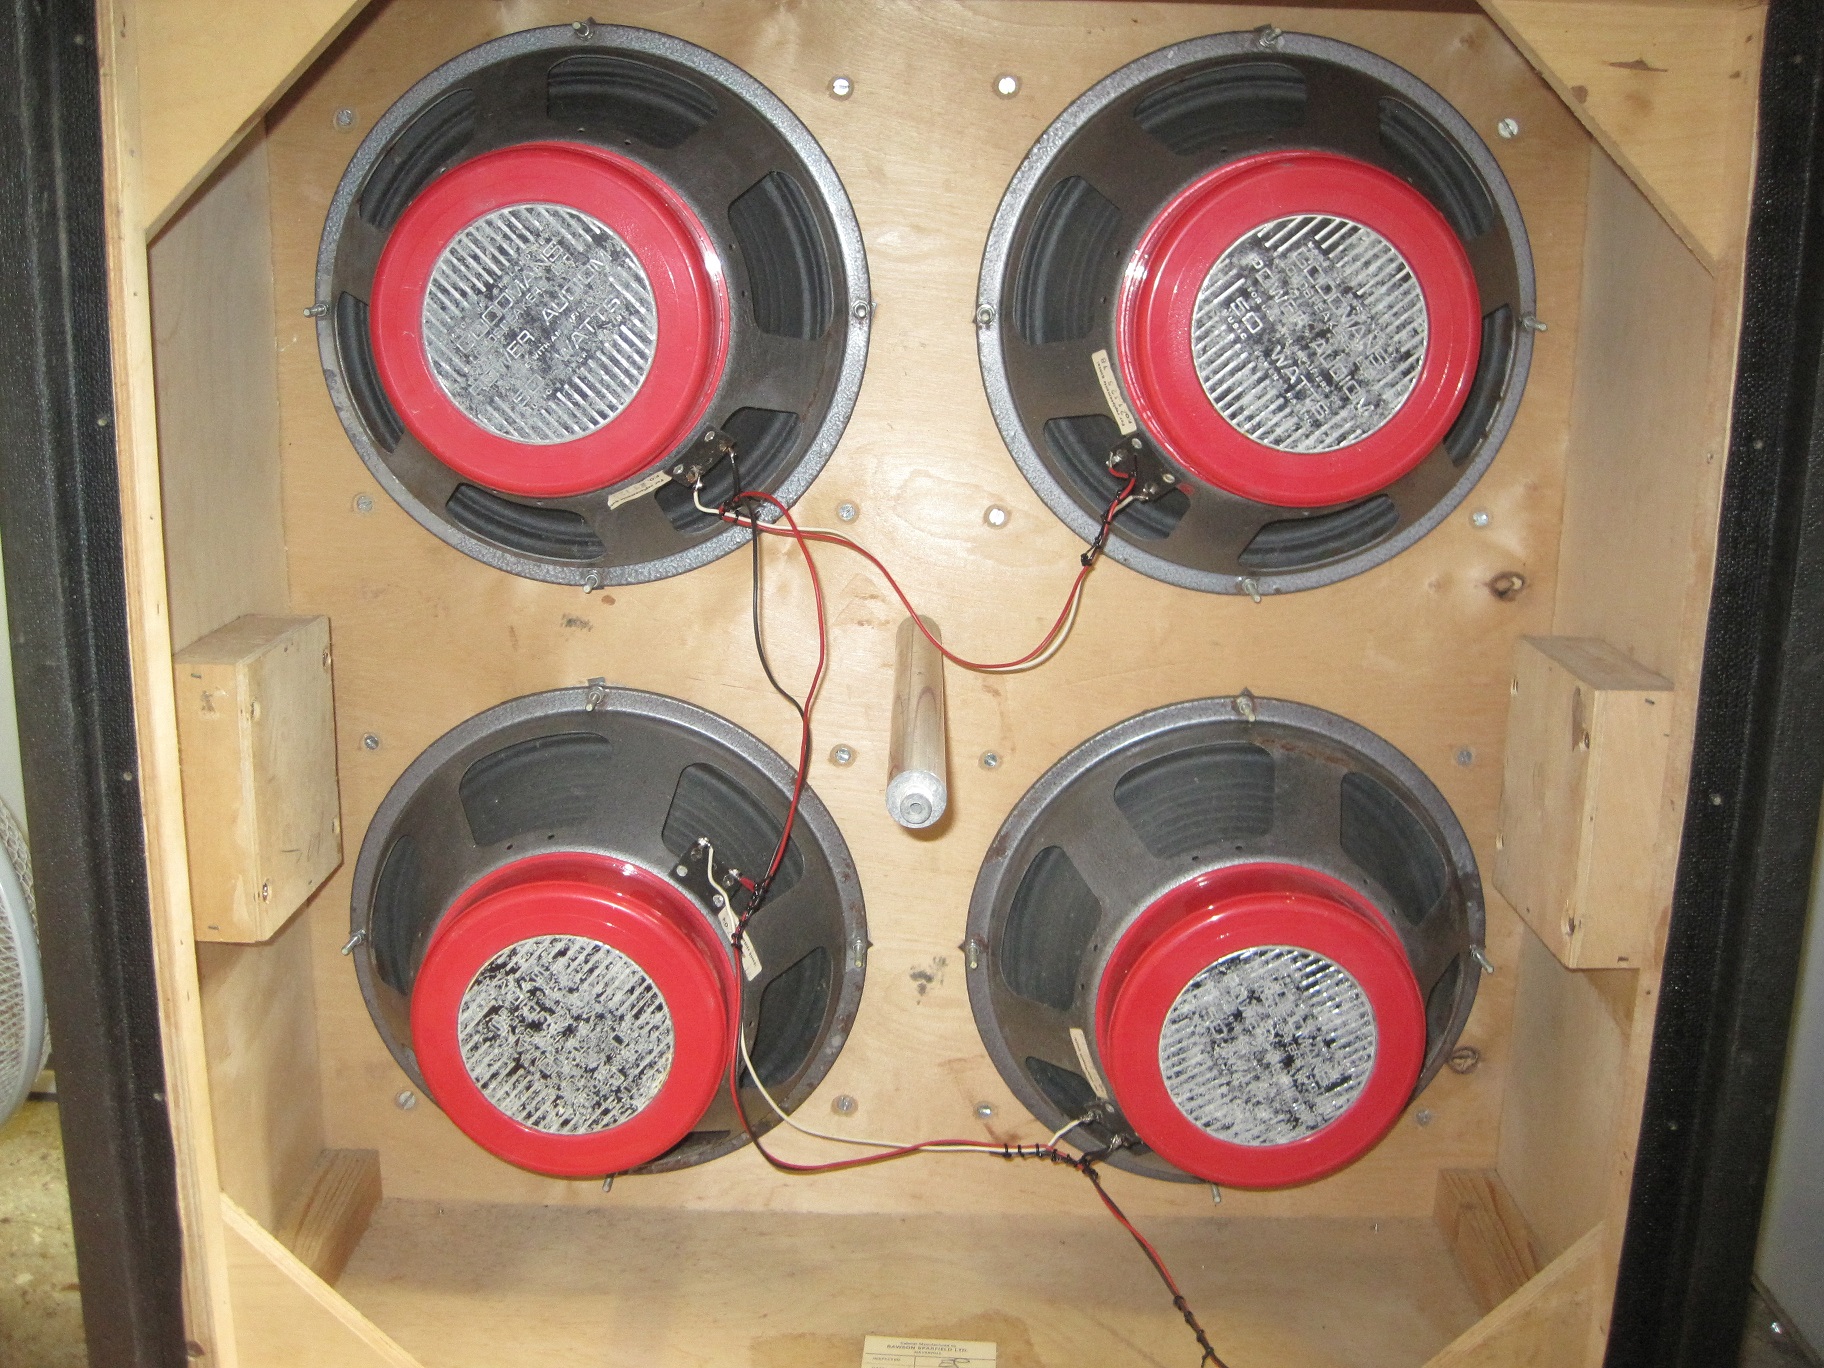
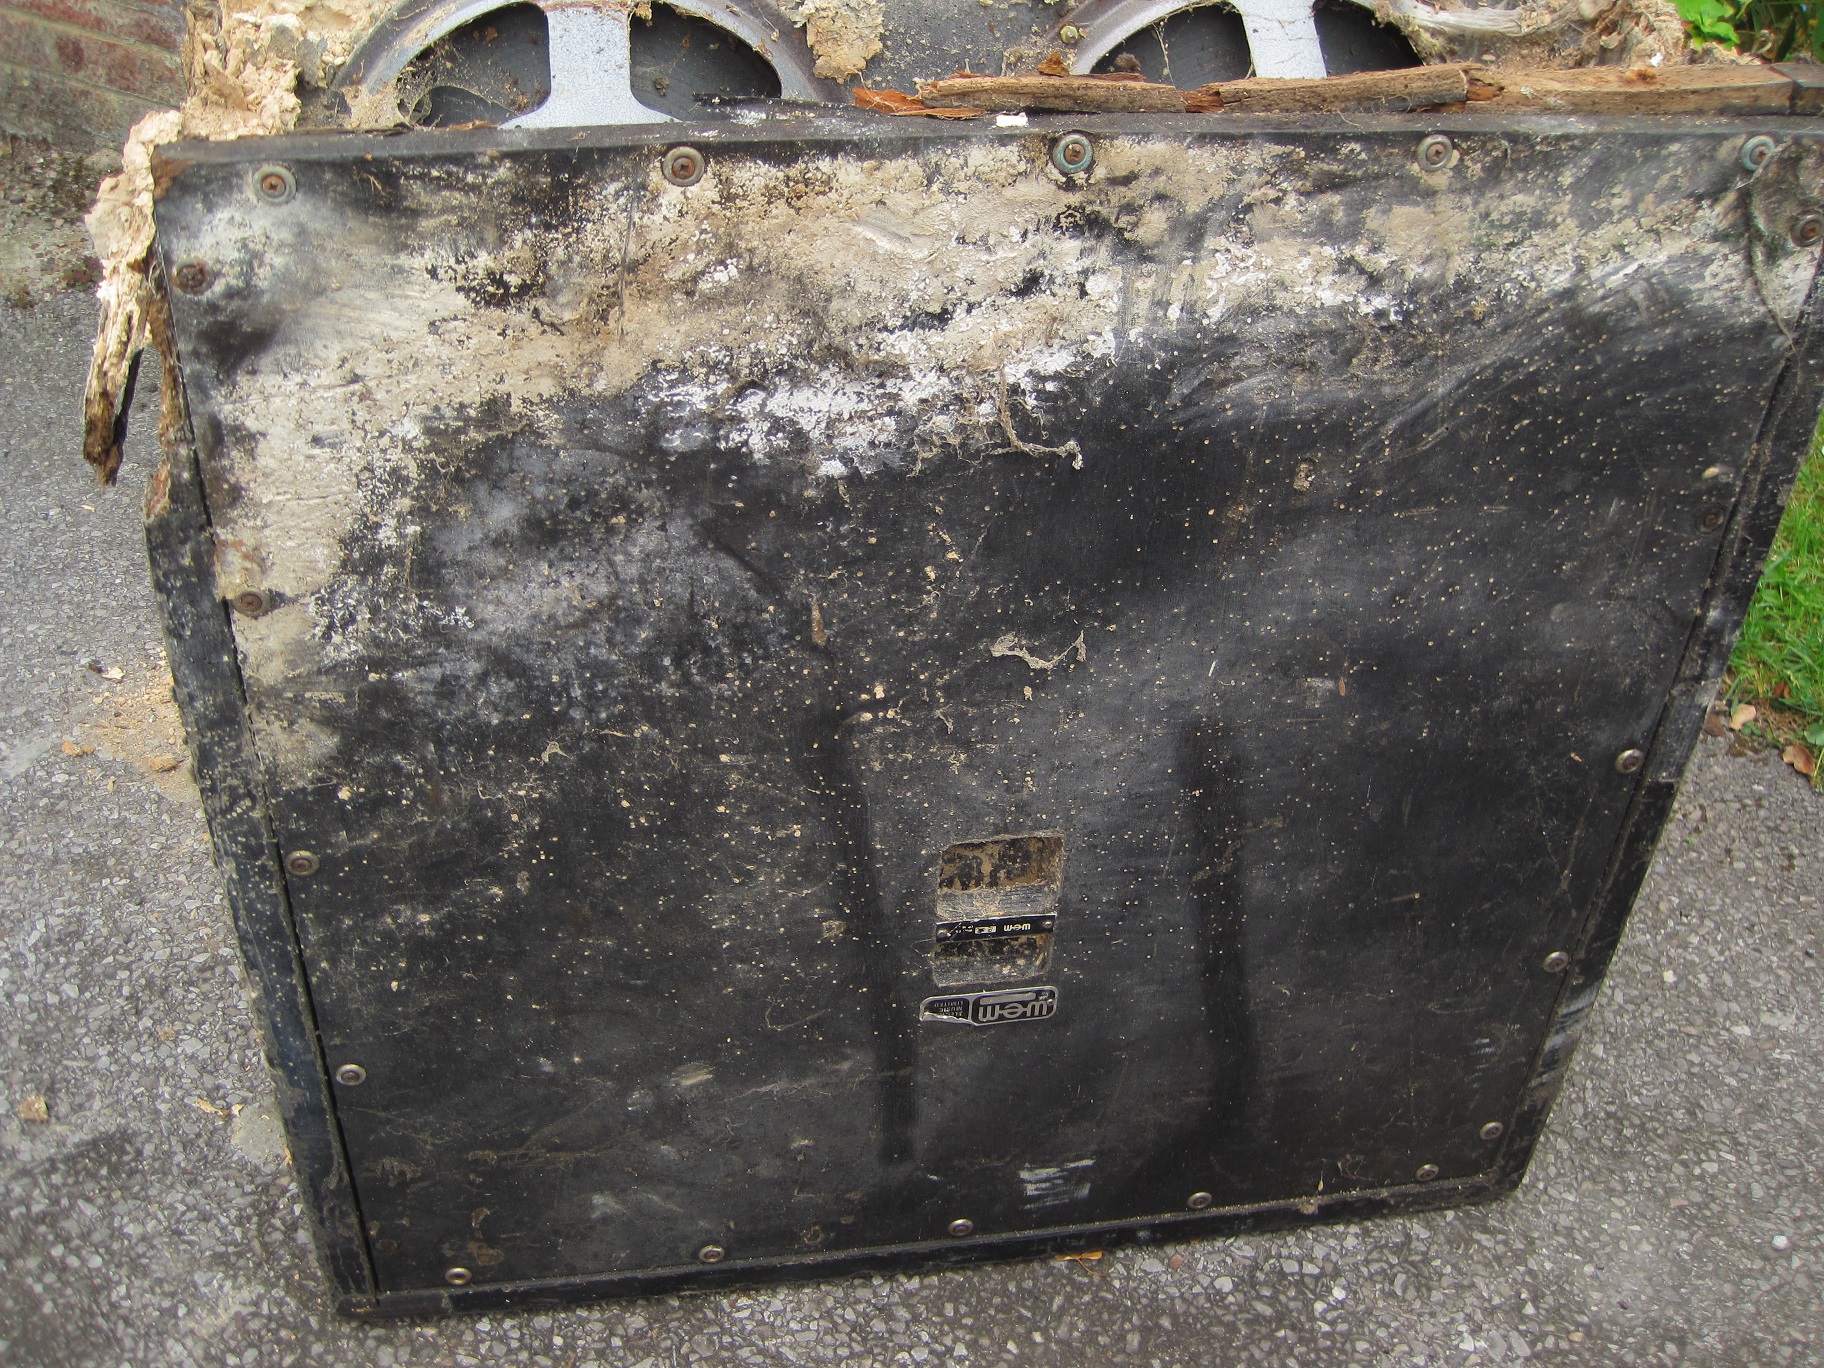
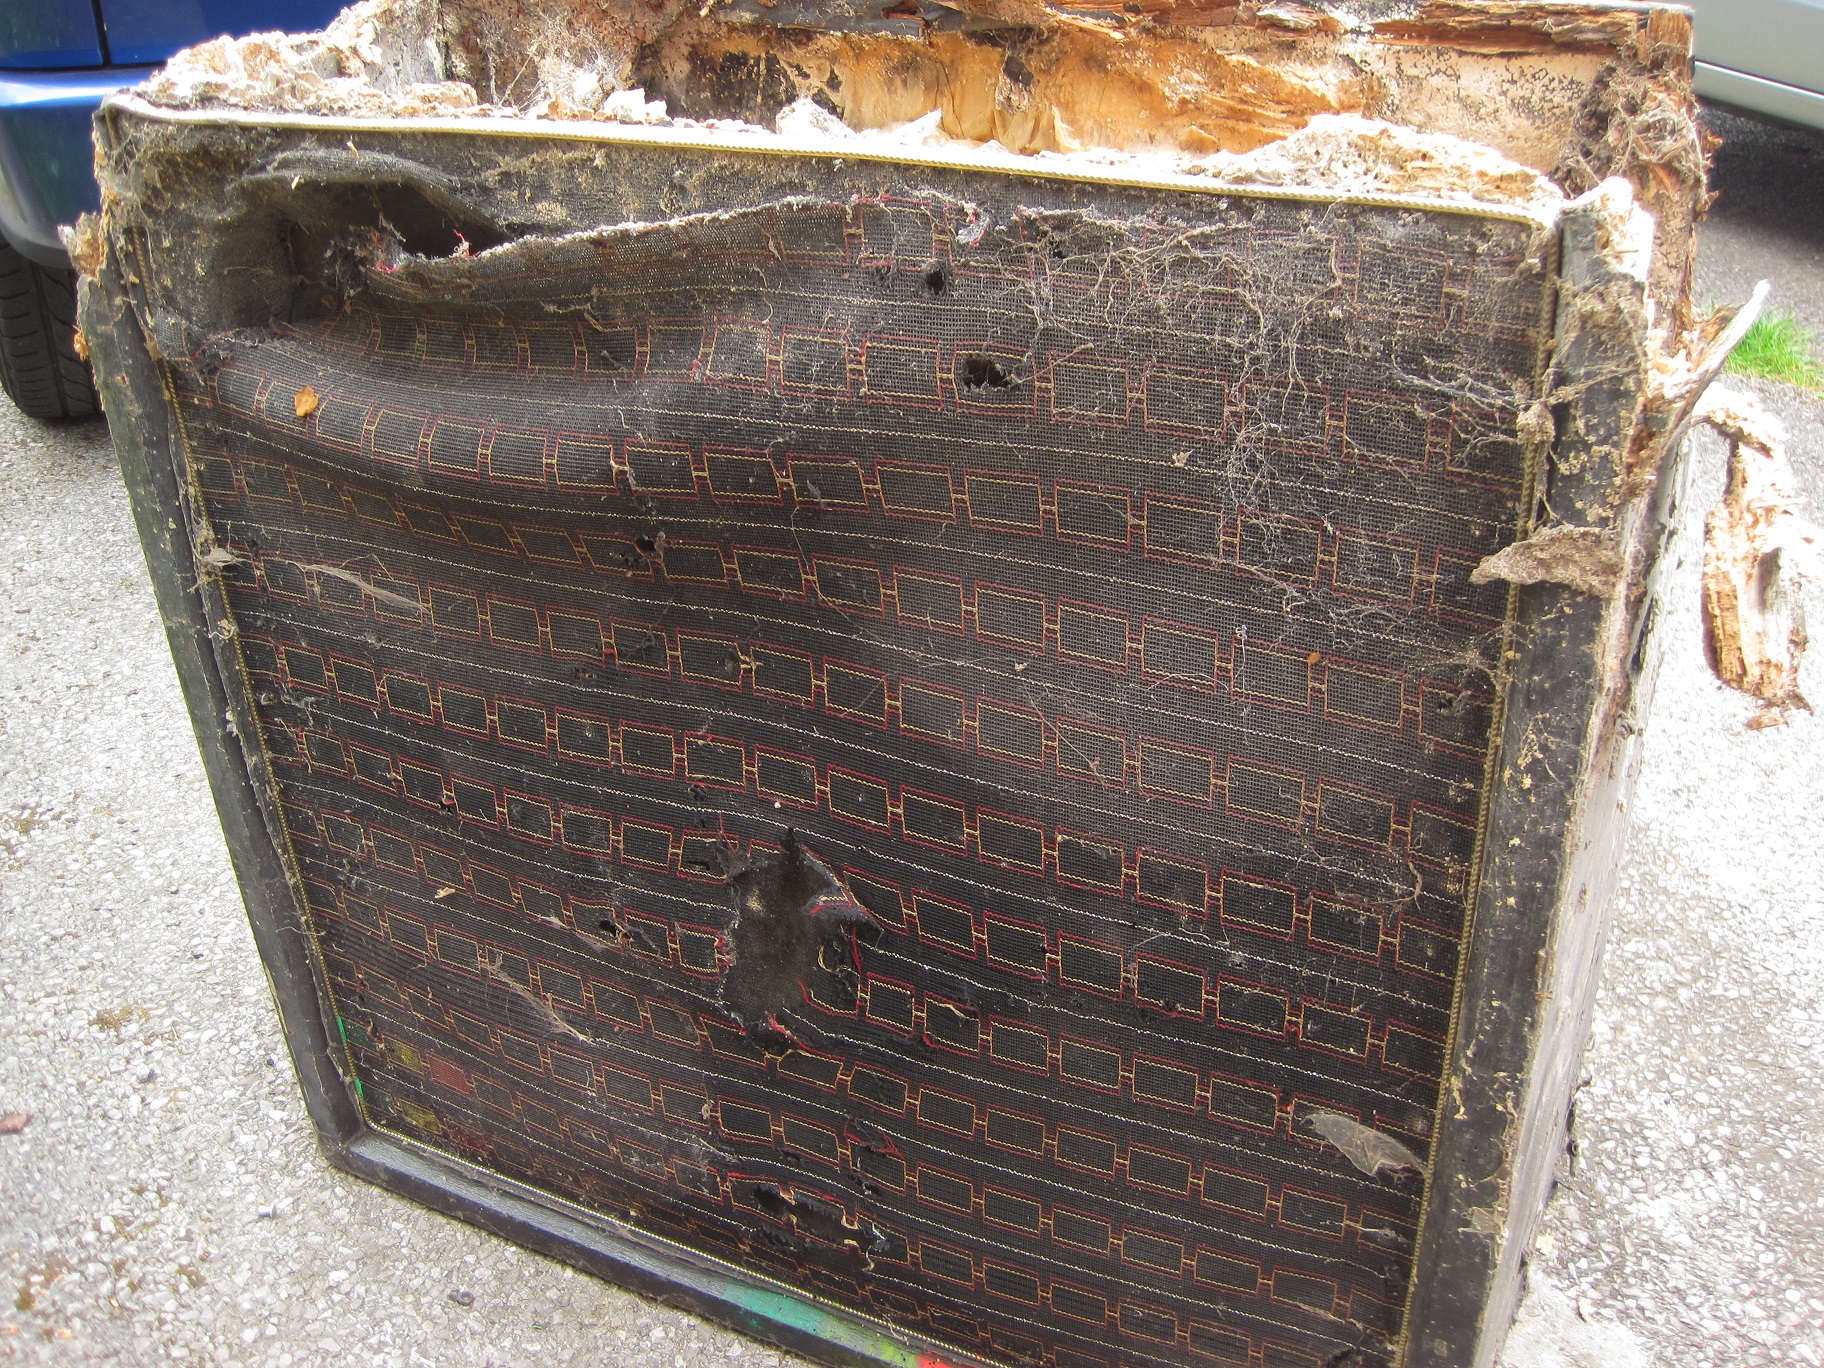
I met my acquaintance a short time later and I was surprised to find that the cabinets were both original rare WEM Starfinder 4×12” guitar cabs. Sadly, to say that one was in very poor condition was an understatement. Almost 40% of the cabinet had been reduced to a pile of dust by an infestation of woodworm. This was a great shame as the cabinet was a very early Starfinder with the serial number 00111 so probably one of the first ever made in the 1960s. The good news was the cabinet had been kept dry and so all 4 original Goodmans Power Audiom 50 watt drivers were intact and undamaged, although rather dirty. I was also able to salvage the original WEM serial number nameplate and the gold piping that went round the perimeter of the front baffle and also a small quantity of the iconic WEM grille cloth.
The second Starfinder cabinet was in much better condition. It was intact and the woodwork was in remarkably good condition. The speakers were also intact. This cabinet had 3 original Fane drivers and a single Mckenzie driver. (I assume that one of the original 4 Fanes must have blown at some time and the Mckenzie was fitted as a replacement.) The McKenzie is an excellent driver but it would have been good if all 4 Fanes had been present. Of the 3 remaining Fanes, 2 had a very small tear in the cone which looked like they were caused just by old age. They still worked well and sounded excellent and I made minor repairs to the tears which has not affected them in any way.
The grille cloth on the second Starfinder cab was also intact with just a few small holes and some age related fading. The cabinet covering was in fairly good condition although rather dirty a with a few spray paint marks where I assume the cabinet had been sat just a little too close to some spray painting at some time. The cabinet itself had not been painted and there were just some minor tears in the covering. The cabinet still had its original back panel including WEM nameplate with serial number and it also had its original internal metal reinforcing bar. The red/gold piping round the perimeter of the baffle was also intact and in good condition. The only part that was in poor condition was the vinyl/tolex covering on the base of the cabinet. This was badly worn with multiple tears.
So that’s what they were like when I got them. Once I had salvaged everything I could from the very early Starfinder, the rest was disposed of as it was totally unusable.
I then set about doing what I could with the second Starfinder :-
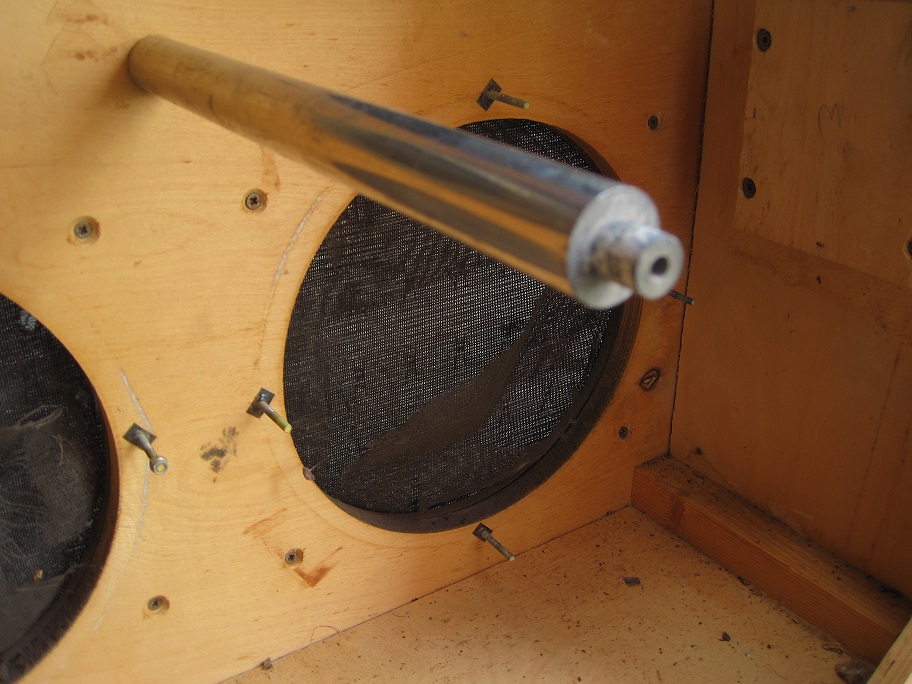
- I removed all four drivers, tested them and then put them safely to one side.
- The front baffle was in 2 layers. The 3/4” thicker solid 12 ply main baffle, to which the drivers are fixed, was well and truly fixed to the cabinet and unmoveable so that stayed where it was. The photos taken during the restoration indicate that the main front baffle is inserted into grooves that have been routed into the 4 sides and that explains why it is so firmly fixed in place. The 3/8” thinner front baffle, to which the cloth and piping is fixed, was screwed in place so this was removed.
- I purchased a piece of vinyl/tolex cabinet covering that closely matched the original covering on the rest of the cabinet and I cut it to shape and fixed it to the base of the cabinet. This is only visible if you turn the cabinet upside down.
- I fitted a set of 4 heavy duty wheels to the base. This cabinet is made of very thick, very strong solid plywood – not the MDF or chipboard found in many other well known but inferior cabinets – so it is extremely heavy, especially when all 4 drivers are loaded, so a set of strong wheels is almost a necessity.
- I removed the piping from the front baffle and also both sets of speaker grill, all of which were stapled in place originally. Those of you that are familiar with early WEM cabinets will know that the black/red/silver sinewave pattern WEM grille cloth is very thin and not particularly strong so WEM reinforced it with a second grille cloth behind the first. The second grille cloth is plain black mesh and I’ve yet to find an old original WEM cabinet on which this second cloth is still intact. On this Starfinder it was badly torn in several places and therefore unusable.
- After I had removed the cloth and piping from the front baffle it just left the 5 ply wooden frame and unfortunately I found that the woodworm had struck again but not too badly and only on the front baffle. I treated the wood with woodworm killer and several of the b*****s literally climbed out of the woodwork, trying to escape. They didn’t get very far and will never damage another piece of wood ever again.
- Once the woodworm had been disposed of, I filled with wood filler the few small holes that they had left behind, which I then rubbed down and followed with 2 coats of black wood stain. That left the front baffle in good strong condition, bug free, and ready to be reused.
- The second layer of plain black mesh grille cloth had to be replaced by something as close as I could find to the original. Not easy to find. I ended up using a piece of the very strong plain black mesh that HH used on the front of their early cabinets. Not the plastic stuff with large holes but the finer stuff that looks much better. This is pretty close to the original WEM cloth and gives the drivers a good level of protection as it is kick-proof provided your shoe size isn’t greater than 8. This was stapled onto the wooden front baffle frame.
- The front patterned grille cloth was then very carefully rinsed in warm water and mild detergent. The water immediately turned a very dark brown as it absorbed more than 40 years of dirt. The cloth itself came out intact and looking much better than it did before. The cloth then went off to my local seamstress who has done speaker cloth repairs for me in the past. She did a superb job patching the small holes in the cloth, although it took her several hours to try to make them as invisible as possible. I then stapled the freshly cleaned and repaired cloth onto the front baffle followed by the outer piping which had also been cleaned. The front baffle was then ready to be refitted back onto the cabinet. The cloth had become frayed around the edges so it had to be stretched a little which made the edges look a little uneven but this was unavoidable as I didn’t want to overstretch the 40 year old cloth.
- Before refitting the front baffle I repaired the small tears and holes in the tolex on the main cabinet. There were surprisingly few considering its age so this didn’t take too long.
- The tolex on the main cabinet and back panel then got the cleaning treatment which consisted of wiping over with a damp cloth and mild detergent, followed by a polish with black renovating polish. Of course, it didn’t look perfect, and never will, but it looks a hell of a lot better than it did before.
- I then fitted a set of corner protectors. I know that WEM didn’t use these but the corners take the most wear and tear and get easily damaged. I used the same corner protectors that are used on Vox, Ampeg and many other vintage cabinets so they are appropriate for the period if not for the cabinet itself. Ok, I accept that takes away a degree of originality but I personally think the corners look good and they certainly do an excellent job of protection. Of course, they can be easily removed if they aren’t wanted.
- So the cabinet was now cleaned, polished, back in one piece including the front baffle, and, even if I do say so myself, looking pretty good compared to how it was when I first got it.
- My final task was to decide which drivers to use and to then fit them and wire them up. I decided to load the Goodmans drivers as there was a full set of them and they were in slightly better condition than the Fanes.
So there you have it. The cabinet is now ready. It looks good and sounds excellent.
I know how rare and sought after these cabinets are and having seen first hand just how strong and well made they are, I’m not surprised.
The work that I’ve done on the cabinet took many hours but I strongly believe it has improved the overall condition and appearance of the cabinet. I apologise to all WEM lovers who would have preferred it if the cabinet had been left untouched, completely original, and still showing its many years of wear and tear. In this instance, the only things that aren’t original are the second layer of grille cloth, the corner protectors, and the new back panel screws which replaced the old worn out originals so the vast majority of this cabinet is original. I fall into the category of those people who prefer things to look and sound as they were intended and I hope there will be a few people out there who agree with me.
Here are some pics of the cab that was beyond repair –

![]()


Some before and after pics of the restored cab –